
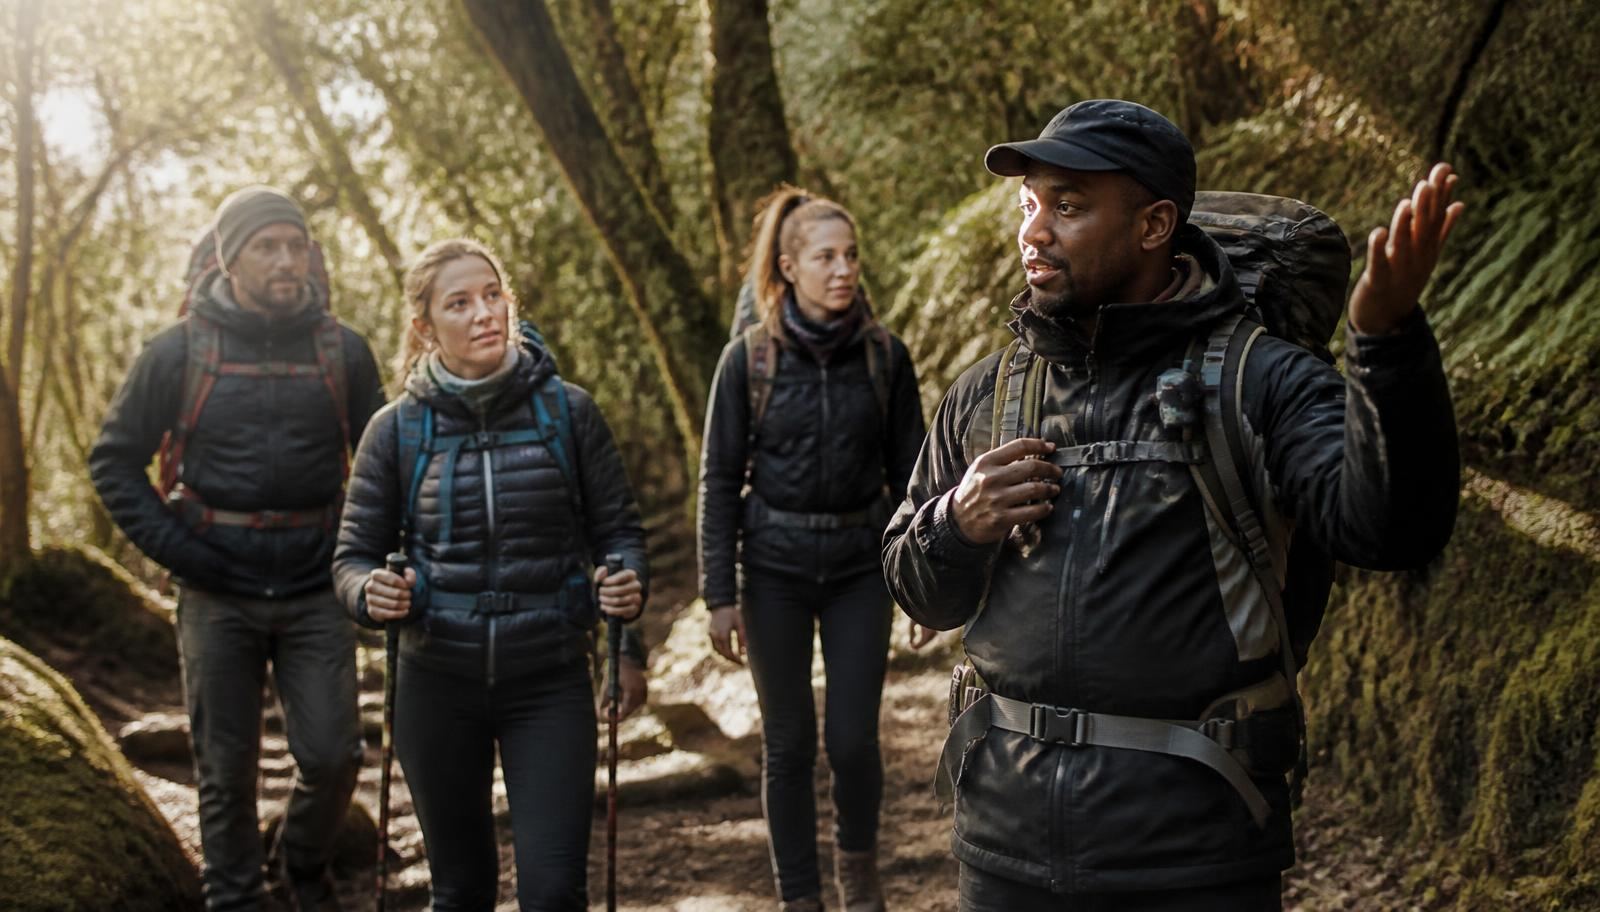
Kilimanjaro Climbing
How to Train for Mount Kilimanjaro: Complete Fitness Guide
A practical, guide-written training plan from Arusha — what to do each week, how much weight to carry, and the preparation that actually decides summit day.

Introduction
Every January, a version of the same email lands in our inbox at the Arusha office. The sender has booked flights, or is about to, and wants to know one thing: what should I actually be doing in the gym? Usually they have already read a dozen articles telling them to "get fit," which is roughly as useful as telling someone to "eat well."
I have been guiding on Kilimanjaro long enough to know that the fitness question is really a confidence question. People are not asking for a spreadsheet. They are asking whether their body, as it currently exists, can walk to 5,895 metres. The answer for most reasonably healthy adults is yes — but only if the months before the climb are spent training for the right thing.
And here is where nearly everyone goes wrong. Kilimanjaro is not a cardio test in the way a half marathon is. It is a slow, repetitive, all-day walking event, done six or seven days in a row, on tired legs, at an altitude where your body is quietly working overtime just to keep you conscious. Training for it means building the specific capacity to walk uphill for hours, recover overnight, and do it again — not to move fast, but to keep moving.
This guide is the plan I give clients directly. It covers how fit you honestly need to be, when to start, what to do each week, how to build strength that protects your knees on the way down, how to eat and hydrate before you fly, and two ready-made schedules — a four-week rescue plan and a full eight-week build. It is written to pair with our Mount Kilimanjaro climbing guide, which handles routes, permits, costs and logistics.
Why Training Matters More Than People Think
There is a persistent myth that because Kilimanjaro is a "walk-up," training is optional. The people who repeat that have usually never watched somebody sit down on the scree at 5,400 metres, eight hours from anywhere warm, because their legs simply stopped cooperating. Roughly a third of climbers do not reach Uhuru Peak, and while altitude is the headline cause, poor conditioning is what turns a manageable bad afternoon into a turnaround.
Fitness does not make you immune to altitude — nothing does. What it buys you is margin. A trained climber uses a smaller share of their capacity to cover the same ground, which leaves energy for the parts of the climb you cannot outrun: the cold, the broken sleep, the appetite loss, the ten hours of darkness on summit night. Fitness is what lets you arrive at Barafu camp with something left in the tank rather than already spent.
There is a second, less obvious benefit. Well-conditioned climbers move more efficiently, breathe more calmly, and recover faster overnight — and overnight recovery is where acclimatization happens. A body that spends the night repairing an overloaded set of quadriceps is a body that is not putting full effort into producing red blood cells. I have watched under-trained clients slide into a spiral: hard day, bad night, worse day, and by day four they are running on fumes with the hardest part still ahead.
Finally, training protects your experience, not just your success rate. Kilimanjaro is extraordinary — five climate zones in a week, sunrise above the clouds from the crater rim, the silence of the Shira Plateau at dawn. If every step is a struggle, none of that registers. Fit climbers come down describing the mountain. Unfit ones come down describing the suffering.
How Fit Do You Need to Be?
Let me replace vague advice with a number you can test. If you can walk for six hours on hilly ground carrying an eight-kilogram daypack, and get up the following morning and walk another four hours without dread, you are ready for Kilimanjaro. That is the whole standard. Nothing about VO2 max, nothing about body fat, nothing about how much you squat.
Notice what that benchmark emphasizes: duration and repeatability. The mountain never asks for a hard effort until summit night, and even then the effort is hard because of oxygen, cold and duration rather than pace. Most Kilimanjaro days involve five to seven hours of walking at a speed that will feel insultingly slow — around two kilometres an hour on the steeper sections.
Self-assessment benchmarks
| Test | Standard to hit | Why it matters |
|---|---|---|
| Long day hike | 6 hours, 15–20 km, 700–1,000 m ascent, 8 kg pack | Mirrors an average Kilimanjaro day almost exactly. |
| Back-to-back hikes | Repeat the above the following morning | The mountain's difficulty is cumulative, not single-day. |
| Stair test | 40–60 minutes of continuous stair climbing | Closest urban match to sustained ascent under load. |
| Talk test | Hold a conversation while walking uphill | Confirms you are training in the aerobic zone Kilimanjaro uses. |
| Descent tolerance | 800 m of continuous downhill without quad failure | Summit day drops 2,800 m; descent injures more people than ascent. |
| Recovery | Normal energy the day after a long hike | You get seven consecutive days with no rest day on the mountain. |
If you currently fail every one of those, do not panic — that is a starting point, not a verdict. Most of our clients begin somewhere in the middle: they walk a bit, maybe go to the gym, and have never hiked a full day with a pack. Sixteen weeks of structured work moves almost anyone from that baseline to the benchmark above.
Age matters much less than people assume. Our oldest summit client was seventy-eight. What older climbers tend to need is a longer runway — six months rather than three — and more attention to recovery, joint care and strength. Younger climbers usually need the opposite lesson: slow down, and stop assuming that a decent five-kilometre time translates into all-day walking capacity.
When Should You Start Training?
Twelve to sixteen weeks is the answer for most people, and I would rather you start twenty weeks out at low intensity than eight weeks out in a panic. The reason is tissue, not lungs. Cardiovascular fitness responds quickly — you can see meaningful aerobic gains within three or four weeks. Tendons, ligaments, foot structures and the small stabilizing muscles around your knees and ankles adapt on a much slower timeline, measured in months.
That mismatch is exactly why crash-training goes wrong. Someone with four weeks left builds enough aerobic fitness to feel confident, then loads their knees with volume their connective tissue has not earned, and arrives in Moshi nursing a sore IT band. Altitude does not fix minor injuries; it amplifies them, because everything heals slower up there.
Choosing your runway
- Already hiking regularly: 8 to 12 weeks of focused, Kilimanjaro-specific work is plenty. Use the eight-week plan below and add pack weight early.
- Generally active, no hiking: 12 to 16 weeks. Run the eight-week plan twice, with a lower-volume base block first.
- Sedentary starting point: 20 to 24 weeks. Spend the first eight weeks simply walking daily and building to a two-hour hike before adding structure.
- Four weeks or fewer: Use the four-week plan, book the longest itinerary you can, and accept that comfort — not success — is what you are sacrificing.
Timing also interacts with when you climb. If your trip falls in the January window or the June-to-October dry season, plan backwards from your departure date and make sure your peak training weeks land eight to ten days before you fly. Our best time to climb Kilimanjaro guide breaks down the seasons month by month if your dates are still flexible.
Cardiovascular Training
Cardio is the engine, but the type of cardio matters more than the amount. Kilimanjaro runs almost entirely in what coaches call zone 2 — an easy aerobic effort where you can speak in full sentences. Training predominantly at that intensity teaches your body to burn fat efficiently, keeps your heart rate low for a given workload, and improves the overnight recovery that acclimatization depends on.
Roughly eighty percent of your cardio should be easy, long and boring. The remaining twenty percent can be harder — intervals, tempo work, hard stair sessions — which raises your ceiling so that the mountain's steady demands sit further below your maximum.
Your weekly cardio structure
| Session | Frequency | Duration | Notes |
|---|---|---|---|
| Long slow hike or walk | 1× per week | 3–7 hours | The cornerstone session. Hills, uneven ground, loaded pack, conversational pace. |
| Hill or stair repeats | 1–2× per week | 40–60 min | Steady climbing effort. Build from 6 to 15 repeats over the plan. |
| Steady-state cardio | 2× per week | 45–60 min | Cycling, swimming, rowing, brisk walking or easy running. Zone 2 effort. |
| Intervals | 1× per week (optional) | 25–35 min | 4–6 × 3 min hard with equal recovery. Raises the aerobic ceiling. |
Cycling, swimming and rowing all count and are excellent choices if your joints need a break, but they cannot replace walking. Kilimanjaro is a weight-bearing activity done on your feet for forty-plus hours over a week, and no amount of cycling prepares the soles of your feet for that. Keep at least half your cardio upright and on foot.
One thing worth saying plainly: you do not need to run. Running is convenient and efficient, and if you enjoy it, keep it. But plenty of successful Kilimanjaro climbers have never run a step in training. Fast walking on an incline, done for long enough, delivers everything running gives you and prepares your body for the actual movement pattern of the mountain.
Strength Training
I hesitate to call this "strength" training, because the goal is not to get stronger in a one-rep-max sense. Extra muscle mass demands more oxygen at altitude, which is the last thing you want. What you are building is muscular endurance and joint resilience — legs that can perform the same movement ten thousand times over six days without breaking down.
Two sessions a week is enough. Forty to fifty minutes each. Moderate loads, higher repetitions, controlled tempo, and a strong bias toward single-leg work, because walking is a single-leg activity and mountain terrain is uneven.
The core strength routine
| Exercise | Sets & reps | Why it earns a place |
|---|---|---|
| Box step-ups (knee height) | 3 × 15 per leg | The single most transferable gym movement for ascent. |
| Slow step-downs (eccentric) | 3 × 10 per leg | Bulletproofs quads and knees for the 2,800 m summit-day descent. |
| Goblet or back squats | 3 × 12–15 | General leg endurance and hip strength under load. |
| Walking lunges | 3 × 12 per leg | Single-leg stability on uneven scree and rock. |
| Romanian deadlifts | 3 × 10 | Posterior chain, protects the lower back under a pack. |
| Calf raises (straight & bent knee) | 3 × 20 | Calves and Achilles carry the steep switchbacks above 4,600 m. |
| Plank, side plank, dead bug | 3 × 45 sec each | Core stability keeps the pack from wrecking your posture by day four. |
| Farmer's carry | 4 × 40 m | Grip, trunk and shoulder endurance for poles and daypack straps. |
If I had to keep only two of those, I would keep the step-ups and the slow step-downs. Ascending Kilimanjaro is essentially a hundred thousand step-ups, and descending it is the same movement in reverse with gravity working against your quadriceps. Everything else in the list is support work.
Progression is simple: add repetitions before you add load, and add load before you add sets. Somewhere around week six, start doing your step-ups wearing your loaded daypack. It looks slightly ridiculous in a commercial gym. It is also the most specific training available indoors.
Hiking Practice
If you do nothing else in this guide, hike. One long hike every week, building steadily in duration, elevation and pack weight, will get you further than any gym program. Hiking is the only training that simultaneously prepares your aerobic system, your legs, your feet, your pack tolerance and your patience.
Treat every long hike as a rehearsal rather than a workout. Wear the boots you will wear on the mountain. Carry the daypack you will carry. Use the socks, the poles, the rain shell, the water bladder. The point is to discover problems while you are still an hour from your car, not on day two of the Lemosho route.
How to structure your long hikes
- Duration first: Build from two hours to seven over eight to twelve weeks. Time on feet is the variable that matters most.
- Then elevation: Work toward 800 to 1,000 metres of ascent in a single hike. Repeat laps on a smaller hill if that is what your geography offers.
- Then pack weight: Add a kilogram every week or two until you are carrying eight to ten.
- Then consecutive days: At least twice before departure, hike long on Saturday and again on Sunday. This teaches you what day four feels like.
- Deliberate descents: Do not shuttle down or take the easy route back. Walk the downhill, use poles, and let your quads learn.
- Bad weather on purpose: Hike in rain and cold at least twice. Kilimanjaro's rainforest is humid and wet, and the summit approach sits between −10 °C and −25 °C with wind chill.
Practice pace deliberately, too. Most hikers naturally walk at four to five kilometres an hour. On Kilimanjaro you will walk at two, sometimes less. Spend part of every long hike walking at that ludicrously slow speed, because pole pole is a physiological requirement, not a cultural greeting, and it is surprisingly hard to do for the first time on a mountain.
Stair Climbing Workouts
For everyone who lives in Amsterdam, Chicago, London or anywhere else without a convenient mountain, stairs are the answer. They replicate the exact demand of sustained ascent — repeated single-leg extension against gravity — with none of the travel time. Some of the best-prepared clients I have guided did most of their vertical training in a parking garage.
Three stair sessions worth doing
- Steady climb: 40 to 60 minutes of continuous stair climbing at conversational pace with a loaded pack. The single best indoor Kilimanjaro workout.
- Repeats: Climb 8 to 15 flights, walk down slowly, repeat. The descent portion doubles as eccentric quad training, which the stair machine cannot give you.
- Long ladder: Once a month, climb the equivalent of 1,000 metres of vertical — roughly 300 flights. It takes about two hours and is a genuine confidence builder.
A word on stair machines: they are useful, but they cheat you out of the downhill. Real stairs, stadium steps or a tall building give you both directions. If your only option is a machine, add eccentric step-downs in your strength sessions to compensate.
Flexibility and Mobility
This is the section people skip, and then spend day five wincing every time they stand up. Six consecutive days of walking with a pack shortens hip flexors, tightens calves and stiffens the thoracic spine. Ten minutes of daily mobility work in training, and five minutes each evening in your tent, keeps your stride efficient and your posture upright — and efficient movement costs less oxygen.
Daily ten-minute routine
- Calf and Achilles stretch against a wall — 60 seconds each side.
- Couch stretch or kneeling hip-flexor stretch — 90 seconds each side.
- Hamstring hinge stretch, knees soft — 60 seconds each side.
- Glute and piriformis figure-four stretch — 60 seconds each side.
- Thoracic rotations, ten per side, to undo pack-induced hunching.
- Ankle mobility drills — knee-to-wall, fifteen reps per side.
Ankle mobility deserves particular attention. Kilimanjaro's terrain includes volcanic scree, rock steps and root-laced rainforest trails, and restricted ankles both slow you down and raise your chance of a rolled joint. Add a balance element — thirty seconds standing on one foot with your eyes closed — and you will notice the difference on the Barranco Wall.
Yoga once a week is a genuinely good addition, especially the slower styles. It handles mobility, breathing control and the mental discipline of staying calm under discomfort, which is worth more on summit night than most people expect.
Training With a Backpack
On the mountain, porters carry your main duffel. You carry a daypack containing water, layers, snacks, a rain shell, your camera and personal items — realistically six to eight kilograms, sometimes a bit more on summit night when you add a down jacket and three litres of water.
So train to that number, with a small margin. Finish your build carrying eight to ten kilograms, and the real thing will feel light. What you should not do is strap twenty kilograms to your back in an attempt to make Kilimanjaro feel easy. That is how people wreck their knees and develop a hunched, inefficient walking posture that costs them energy for six days.
Pack progression that works
| Training phase | Pack weight | Focus |
|---|---|---|
| Weeks 1–2 | 3–4 kg | Fit the pack correctly; learn hip-belt load transfer. |
| Weeks 3–4 | 5–6 kg | Adapt shoulders and lower back; check for hotspots. |
| Weeks 5–6 | 7–8 kg | Match real mountain load on all long hikes. |
| Week 7 (peak) | 8–10 kg | Build a comfort margin above summit-night weight. |
| Week 8 (taper) | 4–5 kg | Keep the movement pattern, remove the fatigue. |
Load the pack with what you will genuinely carry — water bladders, clothing, a small first-aid kit — rather than a single dumbbell in the bottom. Weight distribution changes how the pack sits, and a badly packed bag rubs in places a well-packed one never will. Heavier items should sit high and close to your spine.
Mental Preparation
Physical training gets most of the attention, but the climbers I worry about are the ones who have never been uncomfortable on purpose. Kilimanjaro's hardest hours are mental: 3 a.m. on summit night, minus fifteen degrees, nauseated, four hours of walking still ahead, no view, no conversation, just the circle of your head torch on the scree in front of you.
You can train for that. Not perfectly, but meaningfully.
Ways to build mountain-grade patience
- Do one training hike at night, in the cold, with a head torch. It removes the novelty from summit night entirely.
- Finish long hikes when you would rather stop. Deliberately walking the last hour on tired legs builds a mental reference you can call on at 5,400 metres.
- Practice walking without music or podcasts. Learn to be bored comfortably; there is a lot of silence on the mountain.
- Break the climb into small units in advance. Not "summit," but "one hundred steps, then a breath." That is how experienced guides think.
- Rehearse the plan for feeling terrible. Decide now that a headache means you drink, slow down and tell your guide — rather than panic.
One more thing, and I say this to every group at the pre-climb briefing: detach your self-worth from the summit. Roughly a third of climbers turn back, often for reasons entirely outside their control. The people who cope best are the ones who came for the week on the mountain rather than the photograph at the sign. Paradoxically, they also tend to summit more often, because they are not tempted to push through warning signs.
Nutrition Before the Climb
Nutrition in the training months has two jobs: fuel the workload, and arrive at the trailhead with full reserves. Neither is complicated, but both are commonly sabotaged by people who decide to lose ten pounds before their climb.
Do not diet in the eight weeks before Kilimanjaro. Most climbers lose two to four kilograms on the mountain because appetite collapses above 4,000 metres while energy expenditure runs at four to six thousand calories a day. Starting in a deficit means starting the climb with less to give.
What to prioritize in the final eight weeks
| Focus | Target | Why |
|---|---|---|
| Carbohydrate | 55–65% of calories | Primary fuel; digestion of fat is impaired at altitude. |
| Protein | 1.4–1.8 g per kg body weight | Supports the training load and preserves muscle on the mountain. |
| Iron | Test 8 weeks out | Low ferritin blunts red-cell response to altitude — correctable if caught early. |
| Hydration | 3–4 litres daily | Train the habit before Tanzania; thirst disappears above 4,000 m. |
| Alcohol | Minimal in final 4 weeks | Impairs sleep quality and hydration, both critical for acclimatization. |
| Weight | Stable, no cutting | Most climbers lose 2–4 kg on the mountain. Do not start in deficit. |
The iron point is worth dwelling on because it is the one genuinely medical item in this list. Your body responds to altitude by producing more red blood cells, and it cannot do that well without adequate iron stores. Low ferritin is common — particularly in women and in vegetarians — and entirely fixable, but supplementation takes eight to twelve weeks to move the number. Ask your doctor for a ferritin test when you start training, not the week before you fly.
Use training hikes to test your mountain food. Kilimanjaro meals are simple and carbohydrate-heavy: porridge, soup, rice, pasta, stews, fruit. If your stomach is accustomed to that, day three is easier. Bring familiar snacks too — nuts, dried mango, energy bars you actually like — because at altitude you will only eat things that appeal to you, and by day five almost nothing will.
Hydration Strategies
On Kilimanjaro you should drink three to four litres a day, and more on summit day. That sounds obvious until you try it at 4,500 metres, where thirst signalling is blunted, water is cold, and getting out of a sleeping bag at 2 a.m. to urinate is deeply unattractive. Dehydration then produces headaches and fatigue that look exactly like altitude sickness, which is why guides ask about your water intake before anything else.
The solution is to make hydration a rehearsed habit rather than a decision. Start drinking three to four litres a day during training, roughly four weeks out, and your stomach, bladder and routine will all adapt before the mountain adds complications.
Practical hydration habits to build now
- Use a hydration bladder with a hose on training hikes. Sipping every ten minutes beats stopping to unpack a bottle — you will drink far more.
- Carry one insulated bottle as backup. Above 5,000 metres bladder hoses freeze, and a bottle stored upside down inside your pack does not.
- Add electrolytes to one litre a day on long hikes. Plain water alone at high volume can dilute sodium and cause its own problems.
- Check the color of your urine, not your thirst. Pale straw is the target; anything darker on the mountain means drink more, now.
- Practice drinking cold water. On the mountain nothing is warm, and people quietly stop drinking because it is unpleasant.
- Reduce caffeine to a stable moderate intake rather than quitting cold — withdrawal headaches on day two are indistinguishable from early AMS.
Four-Week Sample Training Plan
This plan is for people who booked late, or whose life got in the way. It will not make you optimally prepared — nothing can in four weeks — but it will meaningfully improve your hiking capacity, your pack tolerance and your confidence. Pair it with the longest itinerary you can book.
| Week | Focus | Weekday sessions | Weekend | Volume |
|---|---|---|---|---|
| Week 1 | Baseline and habit | 2 × 45 min steady cardio · 2 × 40 min strength · 1 × 30 min stairs | Sat: 3-hour hike, 5 kg pack · Sun: 60 min easy walk | ≈ 7 hours |
| Week 2 | Add load and vertical | 2 × 50 min steady cardio · 2 × 45 min strength · 1 × 40 min stair repeats | Sat: 4-hour hike, 6 kg pack, 600 m ascent · Sun: 90 min recovery walk | ≈ 9 hours |
| Week 3 | Peak week — consecutive days | 2 × 60 min cardio · 2 × 45 min strength · 1 × 45 min stair repeats | Sat: 6-hour hike, 8 kg pack, 900 m ascent · Sun: 4-hour hike, 8 kg pack | ≈ 13 hours |
| Week 4 | Taper and travel | 2 × 40 min easy cardio · 1 × 30 min light strength · mobility daily | Sat: 2-hour easy hike in your Kilimanjaro boots · Sun: rest, pack, sleep | ≈ 5 hours |
Two rules make this plan safe. First, do not skip week four's taper in an attempt to squeeze in more work — arriving tired is worse than arriving slightly under-trained. Second, if anything hurts sharply, stop that session entirely. With four weeks left there is no time to train through an injury, and a strain that would be a nuisance at home becomes a trip-ender at 4,000 metres.
Eight-Week Sample Training Plan
This is the plan I hand to most clients. It assumes you can already walk for two hours comfortably and can commit five days a week. If you have twelve or sixteen weeks available, run weeks one to four as a base block first, then start again from week one and progress through to eight — that repetition is where the connective-tissue adaptation happens.
| Week | Focus | Key weekday sessions | Long hike | Pack |
|---|---|---|---|---|
| Week 1 | Foundation | 3 × 45 min cardio · 2 × 40 min strength | 2.5-hour hike, 4 kg pack | 4 kg |
| Week 2 | Consistency | 3 × 50 min cardio · 2 × 45 min strength · 1 × 30 min stairs | 3.5-hour hike, 5 kg pack, 400 m ascent | 5 kg |
| Week 3 | Vertical volume | 2 × 60 min cardio · 2 × 45 min strength · 1 × 40 min stair repeats | 4.5-hour hike, 6 kg pack, 600 m ascent | 6 kg |
| Week 4 | Recovery week | 3 × 40 min easy cardio · 1 × 40 min strength · mobility daily | 3-hour easy hike, 5 kg pack | 5 kg |
| Week 5 | Back-to-back days | 2 × 60 min cardio · 2 × 50 min strength · 1 × 45 min stair repeats | Sat 5 hrs + Sun 3 hrs, 7 kg pack | 7 kg |
| Week 6 | Descent conditioning | 2 × 60 min cardio · 2 × 50 min strength (heavy eccentrics) · 1 × 50 min stairs | 6-hour hike, 8 kg pack, 900 m up and down | 8 kg |
| Week 7 | Peak week | 2 × 60 min cardio · 2 × 45 min strength · 1 × 60 min stair repeats | Sat 7 hrs + Sun 5 hrs, 8–10 kg pack, 1,000 m ascent | 8–10 kg |
| Week 8 | Taper | 3 × 35 min easy cardio · 1 × 30 min light strength · daily stretching | 2-hour flat walk in mountain boots, then rest | 5 kg |
How to read the plan
- Week four is a genuine recovery week, not a wasted one. Adaptation happens in the easy weeks; skipping it is the most common reason people plateau or get hurt.
- Weeks five and seven contain the back-to-back weekend hikes. If you can only manage two hard weekends in the whole block, make them these.
- Week six emphasizes eccentric strength and downhill volume. Expect to be sore; that soreness is precisely the adaptation your knees need for summit day.
- Week eight should feel almost too easy. Resist the urge to test yourself. Sleep, stretch, hydrate, and get your kit organized.
- Every long hike should be done in your Kilimanjaro boots and daypack. No exceptions after week three.
Kilimanjaro Fitness Readiness Checklist
- I can walk six hours on hilly ground with an 8 kg daypack.
- I have repeated a long hike on two consecutive days at least twice.
- I have completed 800–1,000 m of ascent in a single training hike.
- I have hiked at least 60 km in the exact boots I will wear on the mountain.
- I can descend 800 m continuously without quad failure or knee pain.
- I have done two strength sessions per week for at least six weeks.
- I can climb stairs steadily for 45 minutes while holding a conversation.
- I have trained at least twice in cold or wet weather.
- I have done one night hike with a head torch.
- I drink 3–4 litres of water daily as a normal habit.
- I have tested my snacks, poles, socks and rain layers on a long hike.
- I have had a medical check and, if needed, a ferritin test.
- I have tapered for the final 7–10 days before departure.
- I have booked a seven-day-or-longer itinerary.
Common Training Mistakes
Most preparation failures fall into a handful of predictable patterns. I have seen each of these dozens of times, and every one of them is avoidable.
| Mistake | What it costs you | The fix |
|---|---|---|
| Training fast instead of long | Legs fail on day four, when cumulative fatigue peaks. | Prioritize hours on feet at conversational pace over speed sessions. |
| Ignoring downhill | Quad and knee blow-ups on the 2,800 m summit-day descent. | Add eccentric step-downs and deliberate downhill hiking every week. |
| New boots bought late | Blisters by day two that compromise the entire climb. | Buy boots 3 months out and log 60+ km in them before flying. |
| Flat treadmill only | No preparation for sustained ascent or uneven ground. | Use 12–15% incline, stairs, or real hills for at least half your cardio. |
| Cramming the last two weeks | Arriving fatigued or slightly injured, which altitude amplifies. | Taper hard. The final ten days should feel almost too easy. |
| Training without the real pack | Hip-belt rub, shoulder hotspots and posture problems discovered too late. | Every long session uses the exact daypack you will carry on the mountain. |
| Assuming fitness beats altitude | Fast early pace, poor acclimatization, turnaround at 5,300 m. | Train hard, then walk slowly. Fitness buys comfort, days buy the summit. |
There is one more mistake that does not fit neatly in a table: training hard and then booking a short itinerary. It is the single most self-defeating combination we see. Someone spends four months preparing meticulously, then saves a few hundred dollars by choosing a six-day climb, and turns around at Stella Point because their body had two fewer nights to adapt. Fitness and acclimatization are not interchangeable. You need both, and the days are easier to buy than the fitness. Our routes comparison guide lays out which itineraries give you the best acclimatization profile.
Small errors with outsized consequences
- Cutting toenails the night before you fly. Do it a week out; freshly trimmed nails and 2,800 metres of descent are a painful combination.
- Never testing trekking poles. Poles reduce knee load substantially, but only if you have learned to use them rhythmically.
- Training only in dry conditions. Wet feet behave differently, and the rainforest section is genuinely humid.
- Skipping sleep during the training block. Sleep is where adaptation happens, and it will already be compromised at altitude.
- Assuming a gym membership equals mountain readiness. Machines rarely replicate sustained loaded ascent or uneven ground.
If you are climbing as part of a longer Tanzania trip, remember that the recovery side matters too. Descending to Moshi and flying straight into a safari the next morning is doable but tiring; our Tanzania safari health guide covers vaccinations, malaria prevention and how to look after yourself in the lowland parks after the mountain.
Common Questions
Frequently Asked Questions
No, and in twenty years of guiding I have watched athletes turn back while ordinary walkers reached Uhuru Peak. Kilimanjaro is an endurance event conducted at a deliberately slow pace, so it rewards steady aerobic conditioning, patience and preparation far more than power, speed or a low body-fat percentage. The practical standard we give clients is this: you should be able to walk for six hours on hilly terrain carrying a seven-kilogram daypack, and get up the next morning and do it again without feeling wrecked. Most reasonably healthy adults can build that in three to four months of consistent work. What athletes do sometimes have is a habit of pushing hard, and on this mountain pushing hard on days one and two is exactly how you outrun your own acclimatization. If you can hold a relaxed conversation while walking uphill for an hour, you are fit enough to start planning a climb.
Yes. The majority of people standing on the summit sign each morning are beginners in the mountaineering sense — no ropes, no crampons, no prior high-altitude experience. Kilimanjaro is a walking mountain with one hands-on scramble at the Barranco Wall, and porters carry the heavy gear, so what you personally need is hiking stamina rather than technical skill. That said, beginners should stack the deck: book a route of seven days or longer, train specifically for at least three months, do several full-day practice hikes with a loaded pack, and break your boots in properly. The two things that catch first-timers out are underestimating how tiring consecutive long days are, and treating the training window as optional. Do the work and a complete beginner has genuinely good summit odds — often better than a fit person who assumed general gym fitness would carry them.
Three to four months is the sweet spot for most people, and six months is better if you are starting from a sedentary baseline or you are over sixty. That window gives your cardiovascular system, your tendons and your feet time to adapt in the right order. Muscles improve in a few weeks, but connective tissue, joint resilience and the calluses that stop you blistering on day four take considerably longer, which is why people who cram training into four weeks tend to arrive slightly injured. If you only have four weeks, you can still meaningfully improve your readiness — we include a four-week plan in this guide for exactly that situation — but you should pair it with a longer itinerary and accept that the climb will feel harder than it needs to. Consistency beats intensity every time: four moderate sessions a week for sixteen weeks outperforms six brutal sessions a week for six.
Running builds an excellent aerobic engine, and runners generally handle the daily walking well, but running alone leaves three gaps. First, it does almost nothing for the specific muscle pattern of climbing uphill for hours under a loaded pack — that is a hip, glute and calf endurance demand that running does not replicate. Second, it does not prepare your quadriceps and knees for the long descents, which is where most injuries actually occur. Third, running is high-intensity by habit, whereas Kilimanjaro asks you to move very slowly for very long, which is psychologically different and needs practice. Keep running two or three times a week if you enjoy it, then add one weekly long hike, hill or stair repeats, and twice-weekly strength work for legs and core. That combination covers everything running misses.
Yes, but not the way most people imagine. You are not trying to add muscle mass — extra bulk costs oxygen at altitude and does not help you walk. What you want is muscular endurance and joint stability, built with moderate loads and higher repetitions: squats, split squats, step-ups onto a knee-height box, lunges, calf raises, deadlifts or hip hinges, plus core work like planks, dead bugs and side planks. Two sessions a week of forty-five minutes is plenty. Step-ups deserve special mention because they are the closest gym movement to what your legs do for six days straight, and eccentric work such as slow, controlled step-downs is the best insurance against the quad-shredding descent from Barafu. Skip max-effort lifting in the final two weeks; arriving fresh matters more than a personal best.
It is the one thing I would refuse to leave out. Everything else in a training plan is a useful substitute for real hiking, but nothing else teaches your feet, your boots, your pack and your head what a long day on a trail actually feels like. Hiking exposes hotspots before they become blisters, reveals whether your pack rubs, shows you how much water you really drink, and builds the specific slow-walking endurance the mountain demands. Aim for one long hike every weekend in the final two months, working up to six or seven hours on uneven ground with 700 to 1,000 metres of ascent. If you live somewhere flat, substitute stair repeats in a tall building, a stadium, or a treadmill at maximum incline — but still get out onto real trails whenever you can, even if the hills are small.
On the mountain, porters carry your duffel and you carry a daypack of roughly six to eight kilograms — water, layers, snacks, camera, rain shell, first-aid basics. So train to that number, and give yourself a small buffer by finishing your build at eight to ten kilograms. Start at three or four kilograms in the first weeks and add a kilogram every week or two so your shoulders, hips and lower back adapt without complaint. Load the pack with the things you will actually carry rather than a single heavy object; how weight sits against your back matters as much as how much of it there is. Avoid the common mistake of training with twenty kilograms to 'make the real thing feel easy' — that mostly produces sore knees and bad posture, neither of which helps at 5,000 metres.
Long, weighted uphill walking. If you could only do one thing, it would be hiking uphill for several hours with a loaded daypack, at a pace slow enough to talk. It trains aerobic capacity, hip and calf endurance, foot durability, pack tolerance and mental patience simultaneously — no other exercise touches all five. When terrain is not available, stair repeats with a pack are the closest urban equivalent, followed by a treadmill set to twelve or fifteen percent incline at walking speed. Everything else in a good plan exists to support that one activity: strength work protects your knees, mobility keeps your stride efficient, and cardio raises the ceiling. Build your week around the long weighted climb and the rest falls into place.
Conclusion
Training for Kilimanjaro is not complicated, and that is precisely why so many people get it wrong — they look for a clever program when what the mountain wants is boring consistency. Walk uphill with a pack most weeks. Do two short strength sessions. Take one long hike every weekend, and occasionally two in a row. Stretch your hips and calves. Practice drinking more water than feels natural, and practice going slower than feels natural. Do that for three or four months and you will arrive in Moshi with the one thing that actually predicts a summit: a body that is comfortable walking all day, and a head that is comfortable being patient.
The clients who summit are not the strongest ones. They are the ones who put in four months of unglamorous, repeatable work — long walks, stairs, step-ups, a loaded pack, a lot of water — and then walked slowly enough to let their bodies catch up with the altitude. Do that, and the mountain becomes something you enjoy rather than survive.
Ready to Plan Your Kilimanjaro Climb?
Olympus Adventure is a Tanzanian-owned company based in Arusha. We run Kilimanjaro expeditions on every major route with guides, cooks and porters we employ, pay and equip directly. Every climb includes twice-daily pulse-oximeter checks, bottled emergency oxygen, a documented evacuation plan and a guide-to-client ratio that means someone is genuinely watching how you are doing at 5,400 metres.
Tell us your dates, your age, your current fitness and how much time you have before departure, and we will send back a route recommendation, an honest assessment of your summit odds, and a training outline built around your actual starting point — not a generic template. If we think your itinerary is too short for your experience level, we will say so. We would much rather talk you into an eight-day climb than sell you a six-day one you are unlikely to finish.
Keep Reading
More Kilimanjaro Guides
Kilimanjaro
Mount Kilimanjaro Climbing Guide: Everything You Need Before Your Adventure
Kilimanjaro
How Difficult Is Mount Kilimanjaro? A Realistic Guide for First-Time Climbers
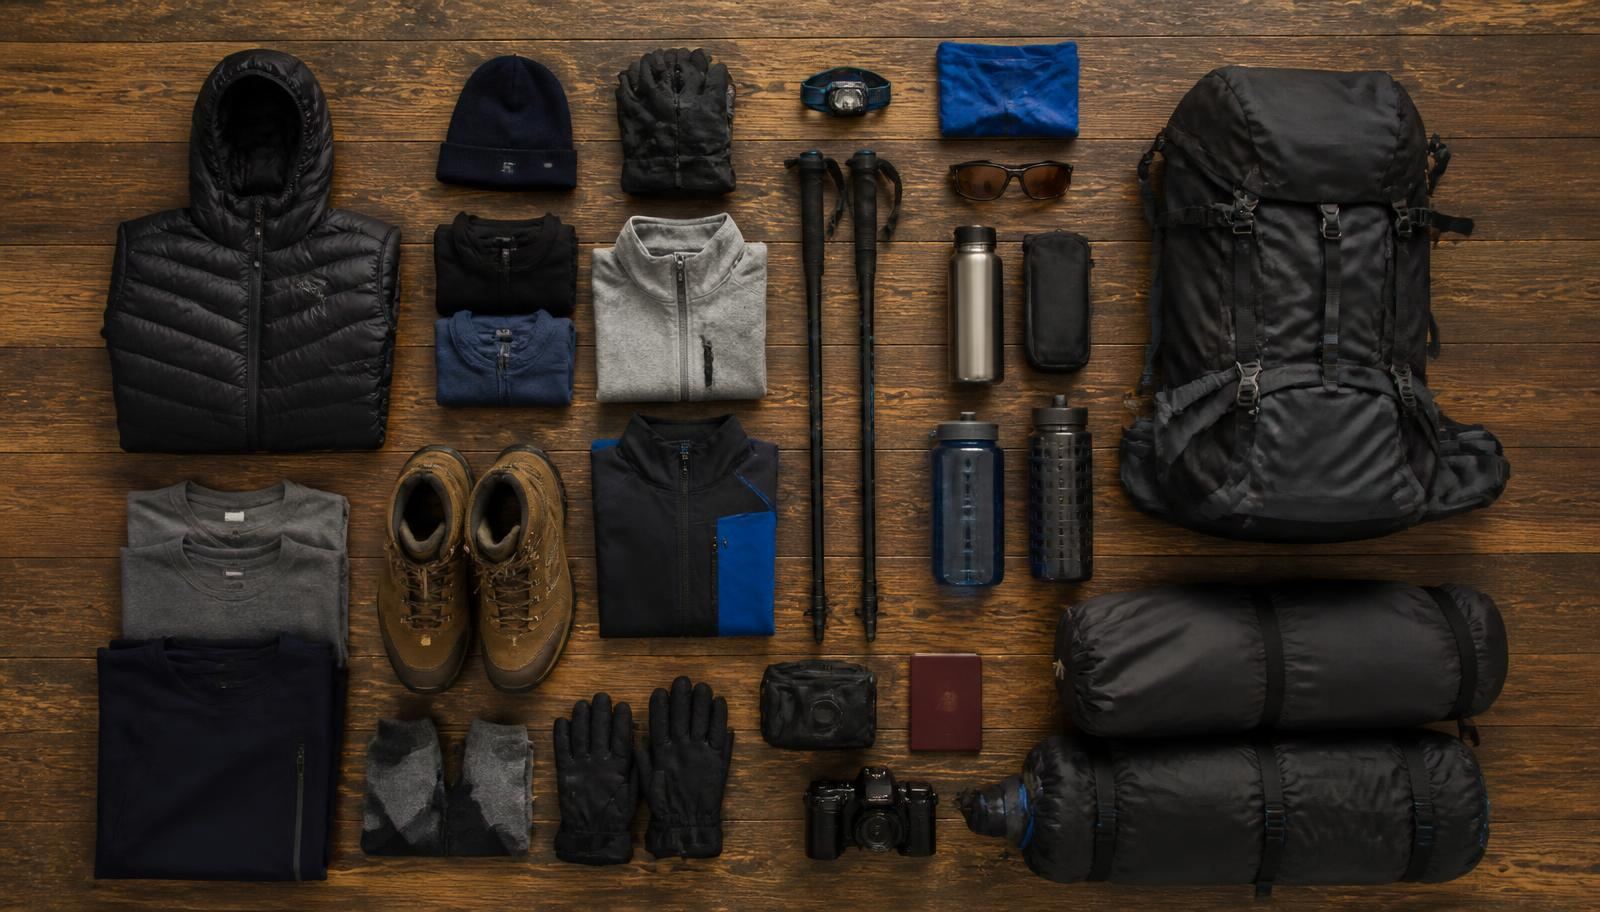
Kilimanjaro
Mount Kilimanjaro Cost Guide: How Much Does It Really Cost to Climb?
Kilimanjaro
Best Time to Climb Mount Kilimanjaro: Complete Month-by-Month Guide
Plan Your Journey
Ready to explore Tanzania?
Let our Arusha-based safari specialists craft a private, tailor-made itinerary around you — no middlemen, no templates, just your perfect journey.
- TALA Licensed Operator
- 4.9 ★ Guest Rating
- No Booking Fees