
Travel Tips
Tanzania Safari Photography Guide: Gear, Settings and Field Technique
A practical guide to photographing wildlife in Tanzania — what to bring, how to set the camera up, how to work from inside a vehicle, and how to protect both your equipment and the animals in front of it.
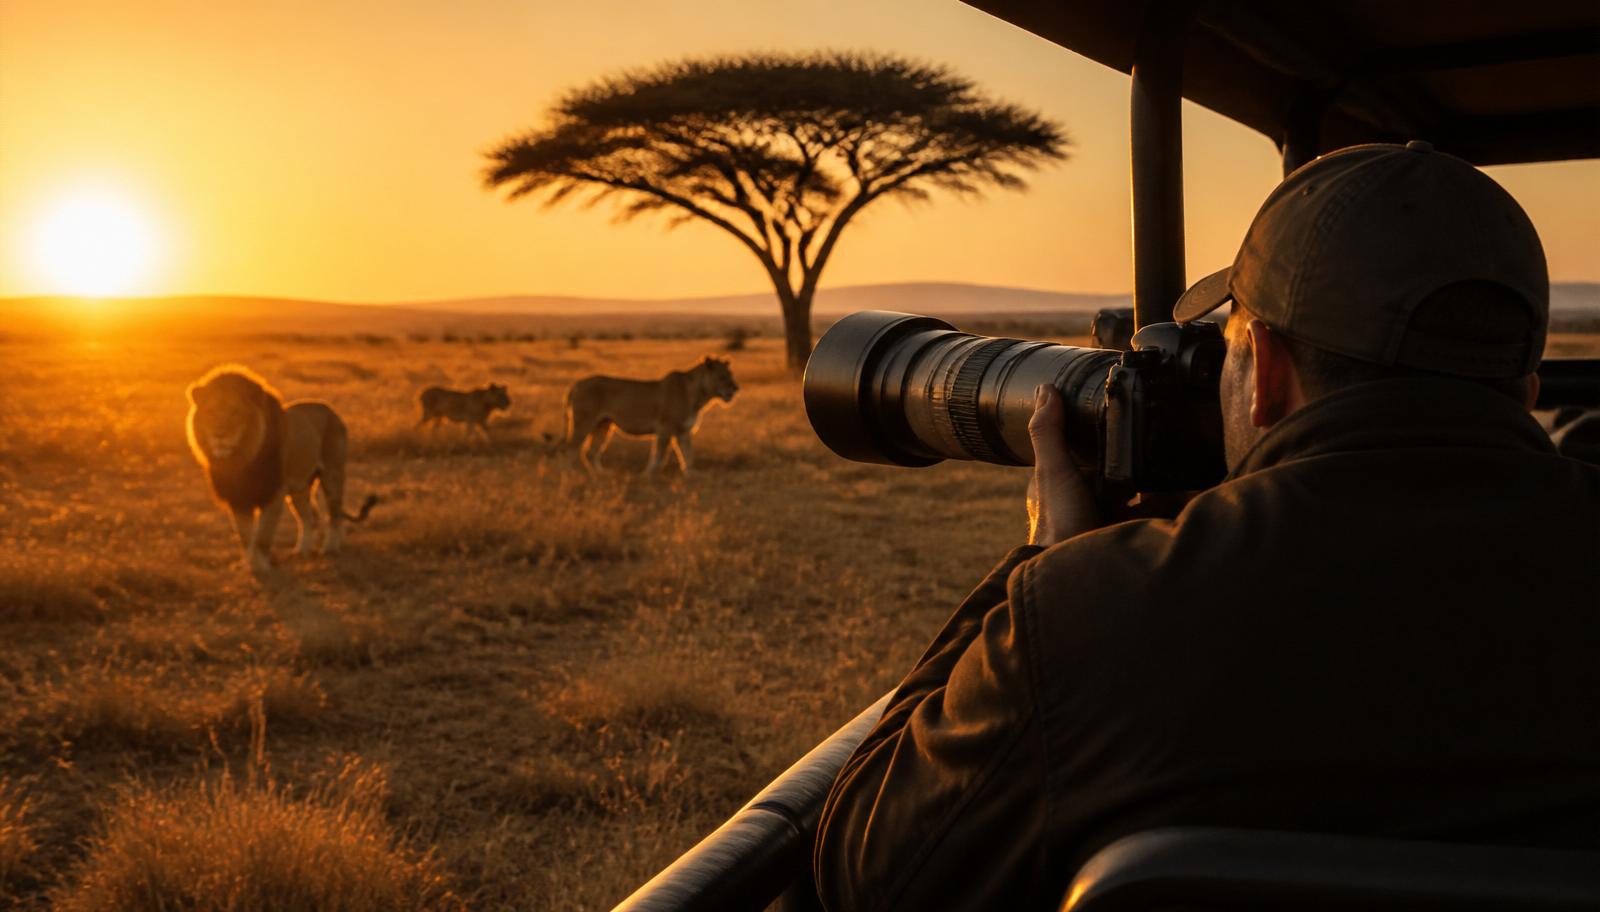
Most people who ask us about safari photography are asking the wrong question first. They want to know which lens to buy. The more useful question is what a day in the vehicle actually looks like: how far away the animals are, how little light there is at the hour when everything happens, how much the vehicle moves, and how much dust ends up on everything you own.
Answer those, and the gear decisions mostly answer themselves. This guide covers the equipment that earns its weight, the settings worth entering before you land, the technique of shooting from a stationary 4x4 with three other people in it, and the practical business of keeping cameras working in heat and dust for a week or more. It also covers the part that matters most and gets discussed least: how to photograph animals without changing what they are doing.
What Makes Safari Photography Different
Safari photography is not general wildlife photography carried out somewhere warmer. Four constraints shape everything you do, and none of them apply in a hide or on a hillside at home.
The first is that you cannot move. You are in a vehicle, on a track, and in most Tanzanian parks leaving that vehicle is not permitted. Your position is negotiated with a driver-guide, not chosen with your feet. The second is that the light is either extraordinary or difficult, with very little in between — a short window of warm low sun at each end of the day, and hard overhead contrast through the middle of it.
The third is that you share the sighting. There may be three other people in your vehicle and several other vehicles at a good leopard. Someone will shift their weight at the moment you press the shutter. The fourth is dust. In the dry season it works into zoom barrels, card slots and hinges, and it is the main reason experienced photographers change lenses as little as possible.
Everything below is written with those four constraints in mind. If you are still deciding when to travel, our month-by-month guide to visiting Tanzania covers how light, rainfall and herd movement line up across the year.
Recommended Camera Gear
Gear recommendations only make sense against a budget and a goal. Someone hoping for good family memories and a few strong wildlife frames needs a very different kit from someone planning to print at a metre wide. What follows is a functional list — what each item is for, and whether it is genuinely necessary.
| Item | What it does | Worth knowing |
|---|---|---|
| One camera body you already know | Autofocus and exposure decisions happen in seconds. Familiarity beats specification. | A camera bought the week before departure is the most common self-inflicted problem we see. |
| A second body, if the budget allows | Lets you keep a long lens and a shorter one ready at the same time. | Not essential. An older body kept as backup is more useful than an expensive lens you rarely fit. |
| Long telephoto zoom | Most subjects sit between about 20 and 80 metres from the vehicle. | The single most important purchase or rental decision of the trip. |
| Standard zoom | Landscapes, close elephant herds, camp life, people, coastal days. | A 24–70mm or 24–105mm covers this comfortably. |
| Beanbag | Steadies a heavy lens on the window frame or roof edge better than any tripod in a vehicle. | Bring an empty one and fill it with rice or beans in Arusha; most operators also carry them. |
| Spare batteries and a car charger | Cold mornings and long bursts drain batteries faster than at home. | Three per body is a sensible target. Check your camp's charging arrangements before you rely on them. |
| Memory cards, plus a backup drive | Card failure is uncommon but not rare, and there is no shop to replace files. | Copy every day. A small portable SSD and a laptop or card-copying device is enough. |
| Rocket blower, microfibre cloths, dry bag or rain cover | Dust in the dry season and short heavy showers in the green season. | Skip aerosol cleaners and avoid wiping a dry lens or sensor. |
| Binoculars | You will see more, earlier, which gives you time to prepare a shot. | Often the most underrated item in a photographer's bag. |
Camera bodies: what actually matters
Three body characteristics make a real difference on safari. Autofocus that tracks a moving animal reliably, usable image quality at high ISO, and enough weather sealing to survive dust. Resolution matters far less than most buyers expect; cropping a well-focused 24-megapixel file usually beats a soft 45-megapixel one.
Current mirrorless cameras from Sony, Canon, Nikon, OM System and Fujifilm all meet those requirements at various price points, and most now include some form of animal-subject detection that finds and holds an eye. A recent DSLR such as a Canon 5D Mark IV, Nikon D850 or D500 also remains entirely capable. Upgrading a body purely for one trip is rarely money well spent — the same budget put into a longer lens, or into an extra night in a good park, usually returns more.
Lens Selection
Lens choice matters more than body choice, and the reason is simple geometry. Tracks are laid where vehicles can drive, not where animals stand. A lion at 40 metres fills a useful part of the frame at 400mm and looks like a distant speck at 200mm. Reach buys you the option of a portrait; without it you are limited to environmental shots, which are worth taking anyway but should not be your only choice.
| Lens | Best used for | Trade-off |
|---|---|---|
| 100–400mm / 100–500mm | General-purpose safari lens. Handles most cats, plains game and mid-distance action. | Reach can feel short for small birds and distant rhino. |
| 150–600mm / 200–600mm | Extra reach for birds, distant predators and crater sightings. | Heavier, slower maximum aperture, harder to hand-hold at dawn. |
| 70–200mm f/2.8 | Close herds, environmental portraits, low light, and animals near the vehicle. | Too short as your only wildlife lens. |
| 24–70mm / 24–105mm | Landscapes, camp, roads, skies, coastal extensions. | Not a wildlife lens, but you will regret leaving it behind. |
| 16–35mm or similar wide angle | Crater rim panoramas, storm skies, stars over camp. | Used less often than people expect. Optional. |
| 1.4x teleconverter | Occasional extra reach on a lens you already own. | Costs light and can slow autofocus; check compatibility before buying. |
| Fixed 400mm, 500mm or 600mm prime | Specialist choice for photographers who shoot wildlife regularly. | Excellent quality, no flexibility, significant weight and cost. |
The two-lens approach
For most travellers, one long zoom and one standard zoom is the right answer. The long zoom lives on the camera for game drives. The standard zoom comes out for landscapes, camp, elephants that walk close, and any coastal extension afterwards. Adding a third lens usually means carrying it unused, and every lens change is an opportunity for dust.
If you own two bodies, put the long lens on one and the standard zoom on the other and stop changing lenses altogether for the week. That single decision removes most of the sensor-dust risk from the trip.
Crop sensors and teleconverters
An APS-C or Micro Four Thirds body gives you a narrower field of view from the same lens, which functions like extra reach. That is a genuine advantage for distant subjects, offset by slightly weaker performance in very low light. A 1.4x teleconverter does something similar optically, at the cost of roughly a stop of light and, on some combinations, slower autofocus. Both are reasonable solutions; neither is a substitute for a lens that starts long.
Camera Settings That Work
Set the camera up before you land. Sightings develop and end quickly, and menu diving in the middle of one is how the frame gets lost. The settings below are starting points rather than rules — adjust them as you learn how your camera behaves in this light.
For most people, aperture priority with auto ISO and a minimum shutter speed is the most reliable configuration. You control depth of field, the camera handles the light, and the minimum shutter speed protects you from the most common failure. Advanced shooters often prefer manual exposure with auto ISO, which fixes both shutter and aperture and lets ISO absorb the changing light.
| Situation | Mode | Shutter | Aperture | ISO |
|---|---|---|---|---|
| Resting lion or leopard, good light | Aperture priority | 1/500s minimum | f/5.6–f/8 | Auto, cap 6400 |
| Walking or alert animal | Aperture priority | 1/1000s minimum | f/6.3 | Auto, cap 6400 |
| Running predator or chase | Shutter priority or manual | 1/2000s or faster | Widest available | Auto, cap 12800 |
| Birds in flight | Manual with auto ISO | 1/2500s or faster | f/6.3–f/8 | Auto, cap 12800 |
| River crossing | Manual with auto ISO | 1/2000s or faster | f/7.1–f/8 | Auto, cap 6400 |
| Sunrise or sunset silhouette | Manual | Set for the sky | f/8–f/11 | 100–400 |
| Landscape from the crater rim | Aperture priority | Tripod or braced | f/8–f/11 | 100–200 |
| Camp and night sky | Manual | 10–20s | Widest available | 3200–6400 |
The rest of the setup
- File format: RAW, or RAW plus a small JPEG if you want something quick to share. Safari scenes carry extreme contrast, and RAW gives you room to recover a dark face or a bright sky.
- Drive mode: continuous, in short bursts of three to five frames. Long bursts fill cards and buffers and rarely contain more usable images than short ones.
- Metering: evaluative or matrix, with exposure compensation as your correction tool. Dark animals against pale grass usually need a little more exposure; sunset silhouettes need less.
- White balance: auto is fine when you shoot RAW, and it copes better than most people expect with dawn colour.
- Shutter type: electronic or silent shutter around cubs, kills and nervous animals. Be aware that electronic shutters can distort very fast motion on some sensors.
- Stabilisation: on, and set to the panning mode when you are following a moving animal.
Shutter Speed Guide
Shutter speed is where most safari photographs are won or lost. Two things are moving: the animal, and the vehicle you are braced against. Even a stationary 4x4 transmits movement whenever someone shifts position, and a long lens magnifies it.
| Subject | Suggested speed | Reasoning |
|---|---|---|
| Sleeping or stationary animal | 1/250–1/500s | Enough to cover vehicle movement and small head turns. |
| Standing animal, ears and tail moving | 1/500–1/800s | Freezes the small movements that quietly soften a portrait. |
| Walking elephant, giraffe, zebra | 1/800–1/1250s | Legs move faster than the body; the body being sharp is not enough. |
| Running wildebeest or lion | 1/1600–1/2500s | Freezes limbs and dust at full stride. |
| Bird in flight | 1/2500–1/4000s | Wingtips travel far faster than the body. |
| Deliberate motion blur | 1/30–1/125s with panning | Sense of speed; expect a low keeper rate and shoot plenty. |
When the light is genuinely marginal — the twenty minutes before the sun appears — you have three options and only three: open the aperture, raise the ISO, or accept blur. Modern noise reduction handles a high-ISO file far better than any software handles motion blur, so raise the ISO first.
Aperture Guide
Aperture controls how much of the animal is sharp and how cleanly it separates from the background. On safari the temptation is to shoot as wide as the lens allows for maximum background blur, and that instinct is often wrong. A lion's head at 30 metres is not flat; at f/2.8 you can put the near eye in focus and leave the far eye soft.
| Aperture | When to use it | Watch out for |
|---|---|---|
| f/2.8–f/4 | Very low light, or a single subject you want strongly separated from the background. | On a large mammal at close range the eye can be sharp while the muzzle is not. |
| f/5.6–f/6.3 | The everyday range for single animals at 20–60 metres. | Most telephoto zooms are already at or near their widest here. |
| f/7.1–f/8 | Two or three animals in the same plane, or a subject you want fully sharp. | Costs a stop of shutter speed; watch ISO in early light. |
| f/8–f/11 | Herds, environmental shots, landscapes with foreground. | Rarely usable before sunrise without pushing ISO high. |
| f/13 and narrower | Deep landscape scenes only. | Diffraction begins to soften fine detail on most sensors. |
One practical note: most affordable telephoto zooms are at their widest aperture by the long end of the zoom range, so at 600mm you may already be at f/6.3 whether you chose it or not. In that case aperture becomes a decision you only make when the light is generous.
ISO Guidance
ISO is not something to be afraid of. It is the variable that lets you keep shutter speed high when the light is low, and on safari the light is low exactly when the animals are most active. Set a ceiling you are comfortable with, then let auto ISO do its job.
| Light | Typical ISO | Note |
|---|---|---|
| Pre-dawn, before the sun clears the horizon | 3200–12800 | Accept noise. A noisy sharp frame beats a clean blurred one. |
| First hour after sunrise | 800–3200 | Falls quickly as the light builds. Auto ISO handles this well. |
| Mid-morning to mid-afternoon | 100–640 | Plenty of light; the challenge here is contrast, not exposure. |
| Forest and riverine shade at Manyara or Tarangire | 1600–6400 | Shaded canopy is far darker than it looks to the eye. |
| Last hour before sunset | 400–3200 | Rises fast in the final fifteen minutes. |
| After sunset, where night drives are permitted | 6400 and above | Only in conservancies and reserves that allow them; not inside national parks. |
Sensor performance varies considerably between cameras and generations, so treat these as ranges rather than targets. The useful exercise is to find your own limit before you travel: photograph the same scene at rising ISO values, look at the files at the size you actually print or share, and decide where the noise stops being acceptable to you. That number is your cap.
Autofocus Tips
Continuous autofocus, always. Single-shot focus is for subjects that do not move, and almost nothing on safari qualifies for long. Beyond that, the useful skill is choosing how much of the frame the camera is allowed to consider.
- Small area or single point for an animal in grass, behind branches, or resting in a tree. A wide area will lock onto the nearest grass stem every time.
- Wide area with subject detection for animals moving across open ground and for birds in flight, where you cannot reliably keep a small point on the head.
- Animal-eye detection is genuinely useful and works well on cats and larger mammals. It is less reliable on partially hidden subjects and on unusual shapes, so know how to switch it off quickly.
- Back-button focus separates focus from the shutter release, which helps when an animal moves behind an obstacle and you want to hold focus rather than let the camera hunt.
- Tracking sensitivity set lower stops the camera jumping to a passing zebra mid-sequence. Most systems expose this setting under a name like subject shift or lock-on.
- Focus limiter switches on long lenses restrict the focus range and noticeably speed up acquisition when your subject is never going to be three metres away.
Shooting From a Safari Vehicle
This is the part no online tutorial prepares you for, and it is where most of the practical difference lies. A Tanzanian game-drive vehicle is a Land Cruiser with a pop-up roof, sliding windows and, usually, three rows of seats. How you use it changes your photographs more than any setting.
Shoot low, not high
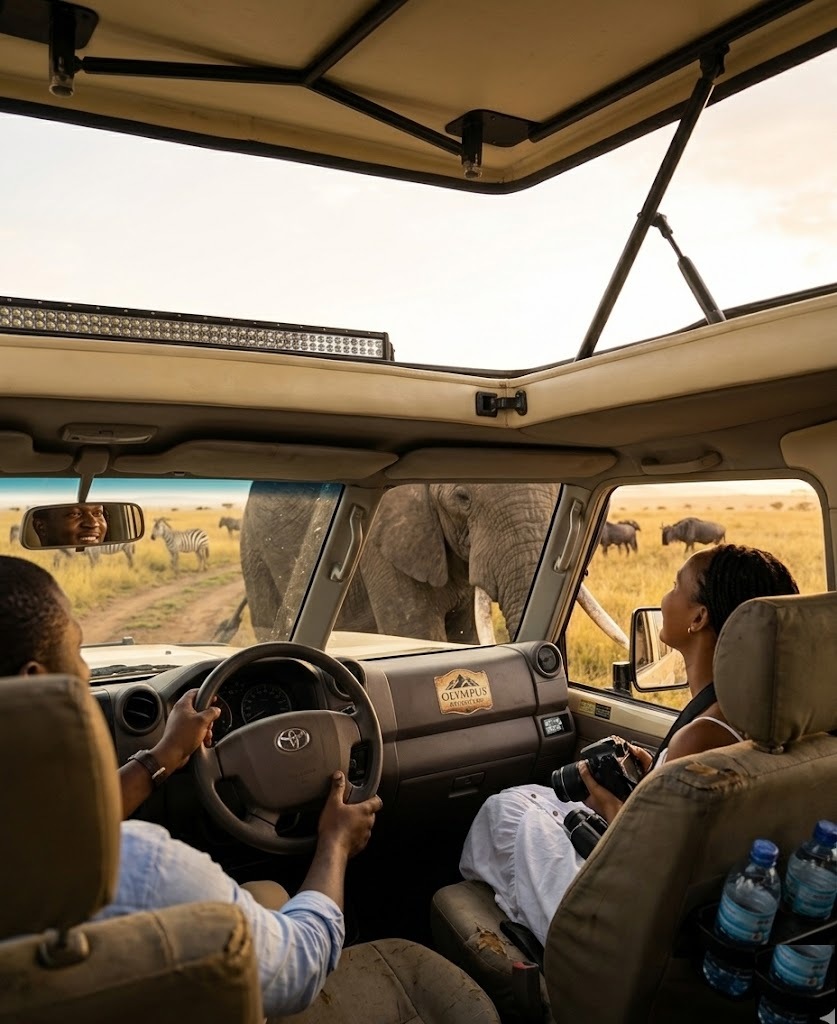
Standing in the roof hatch is comfortable and gives a good view, but it puts your camera two metres above an animal that stands half a metre tall. Every frame looks down. Sitting and shooting through the open window puts you far closer to eye level, and eye-level images consistently feel more intimate. Use the roof for spotting and for elephants, giraffes and tree-climbing leopards; use the window for everything on the ground.
Use a beanbag, never a tripod
A tripod cannot be set up inside a vehicle and is useless there. A beanbag over the window frame or the roof edge takes the whole weight of a long lens, damps vibration, and lets you pan freely. Bring an empty bag and fill it locally with rice or dried beans — full ones are heavy in checked luggage. Most reputable operators carry beanbags, but confirm rather than assume.
Talk to your guide, quietly and early
Your driver-guide controls the single most important variable in the frame: the angle. Tell them at the start of the day that you are photographing rather than sightseeing, that you would like the sun behind the vehicle where possible, and that you are happy to wait. Good guides know exactly what this means and will position accordingly. Asking politely for a metre forward or back is normal and welcome; instructing them to approach an animal more closely than they judge appropriate is not.
Share the vehicle well
If you are with other guests, agree early that everyone stays still during a sighting. Engine off, no sudden weight shifts, no doors. If photography is your main reason for the trip, a private vehicle is worth more to you than a lodge upgrade — you control the timing, the stopping and how long you stay. Our breakdown of safari costs explains where that line item sits in a typical quotation.
Wildlife Composition
Technically correct photographs are easy to produce with current cameras. Interesting ones are not, and the difference is almost entirely composition and timing.
- Focus on the eye, always. If the eye is sharp the image reads as sharp, even when other parts are not.
- Leave space in the direction of the gaze. An animal looking out of the frame with no room in front of it feels cramped.
- Watch the background before the subject. A clean background is what makes a portrait look professional. Bright sky, a vehicle, a distant road or a single branch will undo everything else.
- Take the wider frame too. The image that shows a lone acacia, a storm sky and one small elephant will often outlast the tight portrait in your own memory of the trip.
- Wait for behaviour. A yawn, a head turn, a cub climbing on a parent, two giraffes crossing necks. Frames with an action in them beat frames with a pose.
- Use the kopjes and the trees. The Serengeti's rock outcrops and lone acacias give you natural stages and clean lines that flat grassland does not.
- Shoot vertical sometimes. Tall subjects, tree-climbing lions and giraffes suit a vertical frame, and almost nobody remembers to turn the camera.
Golden Hour and Changing Light
Tanzania sits close to the equator, which means two things for photographers. Sunrise and sunset happen at roughly the same time all year — around 6:30am and 6:30pm, give or take — and the transition through them is fast. The soft warm light you want does not linger the way it does at higher latitudes. You get roughly ninety minutes at each end, and the first and last twenty minutes of that are the best of it.
Being in position for that window is a logistical decision more than a photographic one. Ask your camp the night before to arrange an early departure with a breakfast box rather than a sit-down breakfast; almost every property will do this without fuss. The half hour you gain is the half hour that matters.
In low sun, work with the direction of the light rather than against it. Front light with the sun behind the vehicle gives clean colour and catchlights in the eye. Side light gives shape and texture — good for a buffalo's face or an elephant's skin. Back light gives rim lighting on manes, ears and dust, and is the hardest to expose for: meter for the highlights, let the subject go dark, and accept that you are making a silhouette rather than a portrait.
Through the middle of the day the light is overhead and hard. This is not wasted time. It is when you photograph landscapes with a polariser, work on heat-haze abstracts, edit and back up the morning's files, and rest before the afternoon drive. Fighting midday light rarely produces anything you keep.
Photographing the Great Migration
The migration is a year-round movement, not an event, so what you photograph depends entirely on when and where you are. Two periods stand out for photographers, and they produce completely different images.
Calving, roughly late January to March, in the southern Serengeti and Ndutu. Short grass, huge concentrations of animals, newborn calves and consistent predator activity. Backgrounds are clean, which is a gift for portraits, and cheetah hunting on open plains is at its most visible. Green grass after the short rains also gives you colour that the dry season does not.
River crossings, roughly July to October, in the northern Serengeti. These are dramatic and completely unscheduled. Herds may gather at a crossing point for hours and then turn away. If crossings are your goal, allow at least three or four nights in the north, be prepared for long waits, and pre-set your camera for fast action so you are ready when it starts: 1/2000s or faster, continuous autofocus with a wide area, and enough card space to shoot hard for two minutes.
Frame crossings wider than instinct suggests. The tight shot of one wildebeest mid-leap is the obvious image, but the frame that shows the scale of the column, the dust and the crocodiles is usually the stronger one. Our guide to the wildebeest migration sets out where the herds tend to be in each month, and the northern Serengeti and central Serengeti guides cover access and camps in each area.
Bird Photography
Tanzania records well over a thousand bird species, and birds are the subject most safari photographers underuse. They are also the most technically demanding: smaller, faster, and often in worse light than mammals.
- Use your longest reach. Even a lilac-breasted roller sitting cooperatively on a bush is small in the frame at 400mm from a vehicle.
- Raise the shutter speed. 1/2500s is a reasonable floor for perched birds that may launch, and faster still for anything in flight.
- Watch the perch. Birds return to the same branch. If you miss a departure, wait — you will usually get another chance from the same position.
- Pre-focus on the take-off point when a bird looks like it is about to leave. Raised head, dropped tail and a small crouch are the usual signals.
- Best months for variety run roughly November to April, when migrants from Europe and Asia are present and resident species are in breeding plumage.
- Best locations include Lake Manyara's lake edge, the Tarangire swamps, the Ngorongoro Crater floor and any water in the Serengeti during the dry months.
Low-Light and Night Photography
The two ends of the day are the low-light problem. Before sunrise and after sunset you may have several stops less light than the middle of the day, and the animals are often at their most interesting. Practical approach: open the aperture fully, set the shutter to the slowest speed you trust for the subject, and let ISO go wherever it needs to. Brace against the beanbag, breathe out, and fire short bursts — one frame in five will be noticeably sharper than the others.
Night drives are not permitted inside Tanzania's national parks. They are available in some conservation areas and private concessions, where a spotlight is used under guide supervision. If night photography matters to you, ask before booking whether your chosen areas allow it, and follow the guide's rules on where the light may and may not be pointed.
Star photography is a different and easier proposition. Away from any town, the night sky over the Serengeti is exceptional. A wide lens, a solid surface or small travel tripod, fifteen to twenty seconds at your widest aperture and ISO 3200 will produce a usable frame. Shoot from camp, not from a vehicle, and stay within the lit areas your camp defines after dark.
Dust, Heat and Equipment Protection
In the dry season the tracks are fine powder and every vehicle raises a plume. It gets into everything. None of this is a reason to leave the camera at home, but it does reward a small amount of discipline.
- Keep the camera in a closed bag while driving and out of it during sightings. A padded bag or a hard case on the seat beside you is enough; you do not need an expensive one.
- Change lenses as rarely as possible, with the vehicle stopped, windows up, and the camera pointing down. Have the replacement lens ready before you open anything.
- Use a blower, not a cloth, as the first step on any dusty surface. Wiping grit across a front element is how lenses get scratched.
- Carry a plastic bag or rain cover for green-season showers, which arrive quickly and pass quickly.
- Do not leave gear in direct sun on a vehicle seat. Heat is hard on batteries and on the lubricants inside lenses.
- Let cold gear warm up gradually when moving from an air-conditioned room to humid coastal air, or you will spend twenty minutes waiting for condensation to clear.
- Have the sensor cleaned professionally at home after the trip rather than attempting a wet clean in camp.
Weather sealing helps, and if you are choosing between two bodies or lenses at a similar price, the sealed one is the better safari purchase. It is not a guarantee, though; sealed equipment still needs the same handling.
Batteries, Cards, Storage and Backup
The failures that actually ruin trips are logistical, not optical. A flat battery at 6:40am, or a corrupted card on the last morning, costs more than any lens choice.
- Power in camp varies. Permanent lodges generally have mains power and sockets in the room. Mobile and tented camps often run on solar with a generator for part of the day, and may have a single charging point in the main tent. Ask before you arrive.
- Charge in the vehicle. Most safari vehicles have a 12V socket or inverter. A car charger for your battery type is one of the more useful small items you can pack.
- Tanzania uses UK-style type G sockets at 230V. Bring the adapter and a small multi-way extension so one socket charges several things.
- Bring more cards than you plan to use. Several medium cards are safer than one large one — a failure then costs you part of a trip rather than all of it.
- Back up every evening. Copy cards to a portable SSD, and if you have a laptop keep a second copy on it. Do not format cards until you have two copies.
- Do not rely on camp Wi-Fi for cloud backup. Where it exists it is usually satellite-based and not suited to uploading a day of RAW files.
- Carry cards and drives in hand luggage on internal flights, along with camera bodies and lenses. Light aircraft have strict weight limits, usually 15kg in soft bags, so check the allowance for your routing early.
Our full packing list covers luggage limits, clothing and the non-camera items that make long drives more comfortable.
Smartphone Photography
A current phone is a genuinely good camera within its limits, and those limits are defined by distance. For landscapes, camp life, people, roads, skies and any animal close to the vehicle, a phone produces images most people are happy with. For a leopard at 60 metres it does not, and no amount of digital zoom changes that.
- Use the ultra-wide lens for landscapes and for close elephants that fill the foreground.
- Tap to set focus and exposure on the animal, then adjust brightness before shooting rather than fixing it later.
- Avoid digital zoom past the phone's longest optical lens; crop afterwards instead, which gives the same result with more control.
- Shoot in the phone's RAW mode if it has one, particularly at sunrise and sunset where the automatic processing tends to flatten the scene.
- Hold the phone against the window frame or the roof edge for stability rather than in mid-air.
- Video is where phones genuinely compete. A steady thirty-second clip of a herd walking past is often more evocative than a photograph.
- Clip-on telephoto adapters exist and help a little, but they do not turn a phone into a wildlife camera.
If a phone will be your only camera, consider bringing or renting a pair of good binoculars instead of spending on adapters. You will see far more, and what you remember from the trip is not limited to what you photographed.
Ethical Wildlife Photography
The standard here is simple: a photograph is not worth changing an animal's behaviour. Every experienced guide in Tanzania works to this, and the ones worth travelling with will decline a request that crosses the line.
- Let the guide judge distance. If an animal stops what it was doing, stands up, or fixes on the vehicle, you are too close. Backing off usually restores the behaviour you wanted to photograph.
- Never bait, call or provoke. Playing sounds, throwing food and making noise to trigger a head turn are all unacceptable and, in the parks, penalised.
- Leave an escape route. Vehicles should never encircle an animal, and should not sit between a predator and its intended line of travel.
- Be particularly careful at kills and dens. Use the silent shutter, keep voices down, and accept a shorter stop than you would like.
- Stay on the tracks. Off-road driving is restricted in most Tanzanian parks. A photograph is not a reason to ask a guide to risk their licence.
- Ask before photographing people. Guides, camp staff, Maasai families and market traders are entitled to say no. Where a fee is set for photography in a community, pay it as quoted.
- Leave the drone at home. Drones are not permitted in Tanzania's national parks or the Ngorongoro Conservation Area without a TCAA permit that is, in practice, not available to visitors. Equipment can be seized at the airport.
Our guide to safari etiquette covers conduct around wildlife, camps and communities in more detail.
Where and When to Photograph
Every Tanzanian park photographs differently, and the choice matters more than most itineraries acknowledge. Open plains give clean backgrounds and distant horizons; woodland gives texture and difficult light. A photographer's route is usually shorter and slower than a first-timer's, with more nights in fewer places.
| Place | Photographic strength | Timing |
|---|---|---|
| Central Serengeti (Seronera) | Reliable big cats, open backgrounds, kopjes that give lions natural stages. | Good year-round. Busiest June to October. |
| Southern Serengeti and Ndutu | Calving herds on short grass, predator activity, clean uncluttered horizons. | Late January to March. |
| Northern Serengeti (Kogatende) | Mara River crossings, dust, tension and scale. | Roughly July to October, with no guaranteed dates. |
| Ngorongoro Crater | Species variety in one descent, including rhino at distance. | Year-round; light on the floor is best in the first two hours. |
| Tarangire | Elephant groups and baobabs, which give you compositional anchors. | July to October, when animals concentrate near the river. |
| Lake Manyara | Forest light, waterbirds, baboon troops at close range. | Good as a half-day; birdlife peaks November to April. |
| Ruaha and Nyerere | Few vehicles per sighting, which means cleaner frames. | June to October. Longer flights and fewer facilities. |
Dry season or green season?
The dry months from June to October concentrate animals near water and make them easier to find, but the landscape is pale and dusty and vehicle numbers are at their highest. The green season from November to May gives you dramatic skies, saturated colour, newborn animals and far fewer vehicles, at the cost of taller grass and more searching. Photographers who have been before often prefer the green season for exactly these reasons.
How many nights, and where
Three nights in one area beats one night in three. Staying put means you learn where a particular leopard rests, which pride uses which kopje, and where the light falls at 6:45am. If you have seven days, two areas is plenty. If you have ten, three. Species detail for the Serengeti is in our Serengeti wildlife guide, and where to find the Big Five sets out realistic expectations park by park.
Common Photography Mistakes
| Mistake | What it costs you | Fix |
|---|---|---|
| Shooting standing up through the roof hatch | A downward angle on every animal, which flattens the subject and shows more ground than sky. | Sit and shoot through the window with a beanbag whenever the sighting allows it. |
| Reviewing every frame on the screen | The best moment usually happens while your eye is on the back of the camera. | Check exposure once at the start of a sighting, then keep your eye in the viewfinder. |
| Shutter speed set too low for the light | Frames that look fine on the screen and disappoint at full size. | Set a minimum shutter speed in auto ISO and raise it whenever the subject is moving. |
| Ignoring the background | A branch behind the ear or a bright patch of sky ruins an otherwise good portrait. | Ask the guide to shift a metre or two. Small changes in vehicle position redraw the whole frame. |
| Changing lenses in the open | Dust on the sensor for the rest of the trip. | Change with the vehicle stopped, windows up, camera facing down, and as fast as you reasonably can. |
| Running out of card space by mid-morning | Deleting frames under pressure, which is when good images get lost. | Carry more capacity than you think you need and offload every evening. |
| Only shooting tight portraits | A gallery of similar head shots and nothing that shows where you were. | For every close frame, take one wider one that includes the landscape. |
| Pushing the guide closer than the animal is comfortable with | Behaviour changes, the sighting ends early, and the photographs are worse. | Let the guide judge the distance. Patience produces better frames than proximity. |
Related Guides
- Serengeti Wildlife Guide — which species live where, and when they are easiest to find.
- The Great Wildebeest Migration — month-by-month herd movement and what to expect at crossings.
- The Big Five in Tanzania — realistic sighting odds by park.
- Tanzania Safari Packing List — luggage limits, clothing and everything that is not a camera.
- Best Time to Visit Tanzania — weather, light and crowd levels across the year.
- Northern Serengeti Travel Guide — access, camps and timing for the Mara River season.
- Tanzania Safari for First-Time Visitors — the planning basics if this is your first trip.
- Luxury Tanzania Safari — what higher-end camps and private vehicles actually add.
Common Questions
Frequently Asked Questions
The one you already know how to use. Current mirrorless cameras from Sony, Canon, Nikon, OM System and Fujifilm all autofocus well on animals and handle high ISO capably, and a recent DSLR such as a Canon 5D Mark IV or Nikon D850 remains entirely capable too. Three things matter more than the badge: autofocus that holds a moving subject, usable files at high ISO for dawn and dusk, and enough weather sealing to cope with dust. Buying a new body the week before departure is the most common self-inflicted problem we see — the same budget spent on a longer lens, or on an extra night in a good park, usually returns more.
A long telephoto zoom, because most subjects sit roughly 20 to 80 metres from the vehicle. A 100–400mm or 100–500mm handles most situations; a 150–600mm or 200–600mm adds reach for birds and distant animals at the cost of weight and a slower maximum aperture. Pair it with a 24–70mm or 24–105mm for landscapes, close elephants and camp life, and stop there. Fixed 500mm and 600mm primes are superb but inflexible, and are a specialist choice rather than a first safari one. Renting a long lens for the trip is worth considering if you would not otherwise use it.
Aperture priority with auto ISO and a minimum shutter speed is the most reliable setup for most people. Start at f/5.6 to f/8, a minimum of 1/500s for stationary animals and 1/1000s for anything moving, auto ISO with a ceiling you have tested and are happy with, continuous autofocus, and RAW files. Faster action — a chase, a river crossing, birds in flight — wants 1/2000s or quicker, which usually means manual exposure with auto ISO so both shutter and aperture stay fixed. Enter all of this before you travel; sightings do not wait for menu navigation.
Sit down and shoot through the open window rather than standing in the roof hatch. Standing puts the camera about two metres above an animal that stands half a metre tall, so every frame looks down on the subject; the window puts you close to eye level, which reads as far more intimate. Rest the lens on a beanbag over the window frame — a tripod is useless in a vehicle. Tell your guide at the start of the day that you are photographing rather than sightseeing and that you would prefer the sun behind the vehicle, and agree with the other guests that everyone stays still during a sighting.
It depends entirely on distance. For landscapes, camp life, people, skies and any animal close to the vehicle, a current phone produces images most travellers are pleased with, and its video is genuinely good. For a leopard at 60 metres it is not enough, and digital zoom does not change that. If a phone will be your only camera, use the ultra-wide for landscapes, tap to set focus and exposure, crop afterwards rather than zooming, brace the phone against the window frame, and put the money you would have spent on clip-on lenses into good binoculars instead.
Dry-season tracks are fine powder and every vehicle raises a plume. Keep the camera in a closed padded bag while driving, change lenses as rarely as possible and only with the vehicle stopped and the windows up, and use a rocket blower before any cloth touches glass. Carry a plastic bag or rain cover for green-season showers, keep gear out of direct sun on the seat, and let cold equipment warm up gradually when you move into humid coastal air. Have the sensor cleaned professionally when you get home rather than attempting a wet clean in camp. Two bodies with a lens on each is the most effective dust strategy there is.
Plan for 64 to 128 GB per shooting day, and prefer several medium cards over one large one so a failure costs part of a trip rather than all of it. Around three batteries per body is a sensible target, since cold mornings and long bursts drain them faster than at home. Permanent lodges generally have mains power in the room; mobile and tented camps often run on solar with limited charging points, so ask before you rely on them. Most safari vehicles have a 12V socket, and a car charger is one of the more useful small items to pack. Tanzania uses UK-style type G sockets at 230V.
The first and last ninety minutes of daylight, with the first and last twenty minutes of that being the best of it. Tanzania sits close to the equator, so sunrise and sunset fall at roughly 6:30 in the morning and evening throughout the year, and the transition through them is quick. Animal activity follows the same curve. The middle of the day is harsh and overhead, which is why most drives break for lunch — use that time for landscapes with a polariser, for backing up files and for rest before the afternoon.
Yes, and Tanzania is a forgiving place to learn because sightings are frequent and animals are often unbothered by vehicles. Start in aperture priority at f/5.6 to f/8 with auto ISO and a minimum shutter speed, use continuous autofocus, focus on the eye, and pay more attention to backgrounds than to gear. Practise for a couple of weeks before you travel on anything that moves unpredictably in poor light so the controls become automatic. If you want structured tuition, ask about a guide experienced in working with photographers when you book.
No. Drones are not permitted inside Tanzania's national parks or the Ngorongoro Conservation Area without a TCAA permit, which is difficult, expensive and in practice not available to visiting travellers. Equipment can be seized on arrival at the airport, and flying without authorisation risks fines and prosecution. Leave it at home. If you want an aerial perspective, a hot-air balloon flight over the Serengeti is the legal alternative and is available in several areas.
Not strictly, but it is the single most useful upgrade a photographer can buy. A private vehicle lets you leave before the group would, stay at a sighting after everyone else is ready to move, position for the light rather than the view, and keep the seat next to you free for a second body. If photography is the main reason for the trip, a private vehicle is generally worth more to your results than a higher lodge tier.
The central Serengeti for reliable big cats against open backgrounds, the southern Serengeti and Ndutu for the calving season on clean short grass, the northern Serengeti for Mara River crossings, the Ngorongoro Crater for species variety in a single descent, and Tarangire for elephants and baobabs. Ruaha and Nyerere in the south are quieter, which means fewer vehicles in your frames, at the cost of longer flights. Whatever you choose, fewer places and more nights in each will do more for your photographs than a longer list of parks.
Final Thoughts
The photographers who come home from Tanzania happiest are rarely the ones with the most equipment. They are the ones who knew their camera before they arrived, chose fewer places and stayed longer, were out before the sun and still out after it, and let their guide judge how close was close enough.
Equipment does matter, and a long lens will let you make images a phone cannot. But it is a smaller part of the outcome than the internet suggests. Preparation, timing and patience account for most of the difference, and all three are free.
Preparation, timing and patience account for most of the difference between a good set of safari photographs and a disappointing one. Know your camera before you land, choose fewer parks and stay longer, be out before the sun, and let your guide decide how close is close enough.
Plan Your Journey
Tell us what you want to photograph, and we'll build the route around it
Send us your travel dates, your camera kit and the subjects that matter most to you — big cats, the migration, elephants, birds or landscapes. Our Arusha-based team will suggest the parks and seasons that suit those goals, a private vehicle with a guide used to working with photographers, longer stays in fewer places, and camps positioned for early departures. We cannot promise particular sightings, but we can put you in the right place at the right hour.
- TALA Licensed Operator
- 4.9 ★ Guest Rating
- No Booking Fees
Keep Reading
More Photography & Conservation Guides
Safari Guides
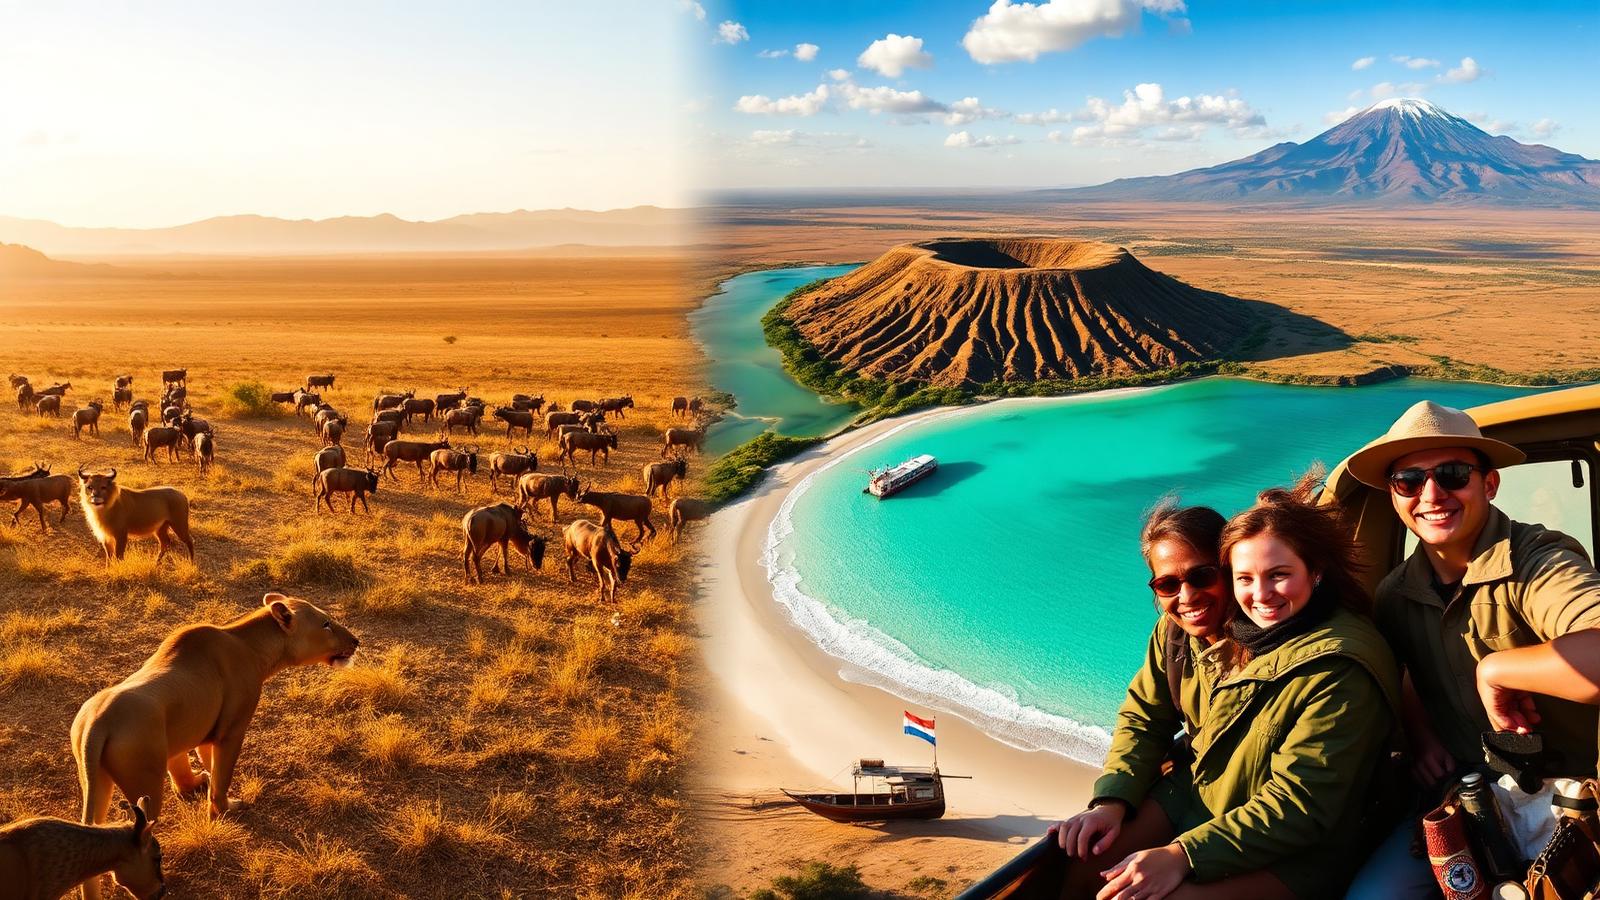
The Ultimate Tanzania Travel Guide: Everything You Need to Know Before You Visit
Kilimanjaro
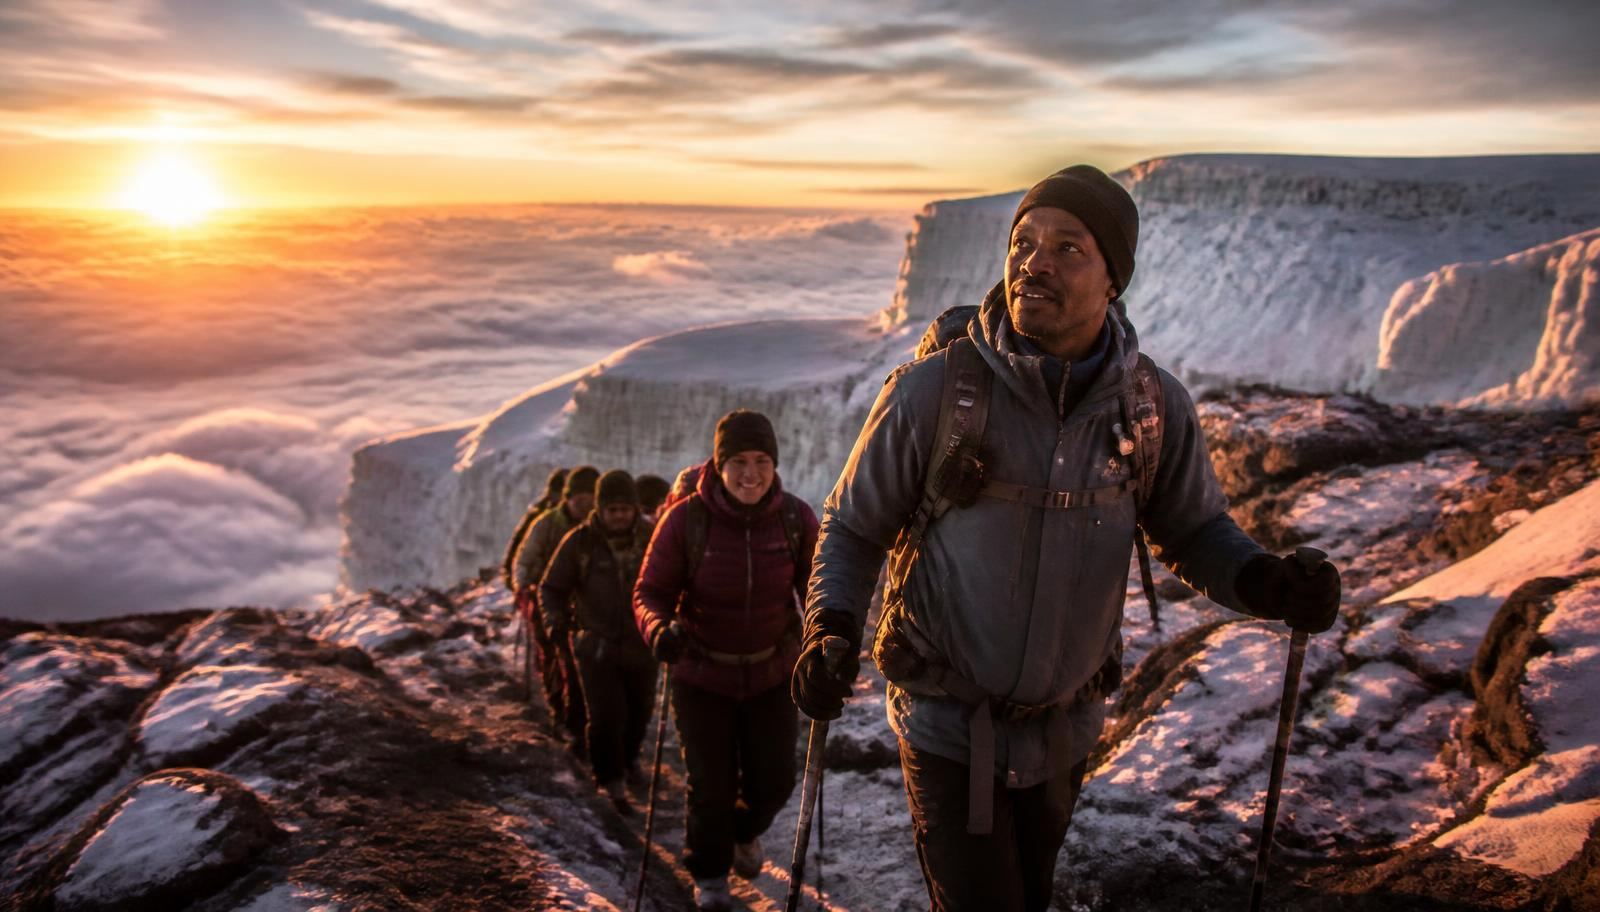
Mount Kilimanjaro Climbing Guide: Everything You Need Before Your Adventure
Zanzibar
Zanzibar Travel Guide: Everything You Need Before Visiting the Island
Culture
The Maasai Tribe in Tanzania: History, Culture, Traditions & Responsible Tourism
Safari Experiences